Unveil the enchanting world of crochet with Decrease & Increase The Diamond Mesh Stitch! This intricate yet versatile stitch is a testament to the craftsmanship inherent in crochet artistry. Known for its striking diamond-shaped gaps, this stitch offers a delightful blend of elegance and functionality, perfect for adding a touch of sophistication to various crochet projects.
Whether you're a novice seeking to expand your crochet repertoire or a seasoned enthusiast eager to refine your skills, our step-by-step instructions and detailed insights promise to empower you in mastering the art of the Diamond Mesh Stitch. Get ready to infuse your crochet projects with a touch of sophistication and intricacy that only this stitch can deliver!
Understanding The Diamond Mesh Stitch
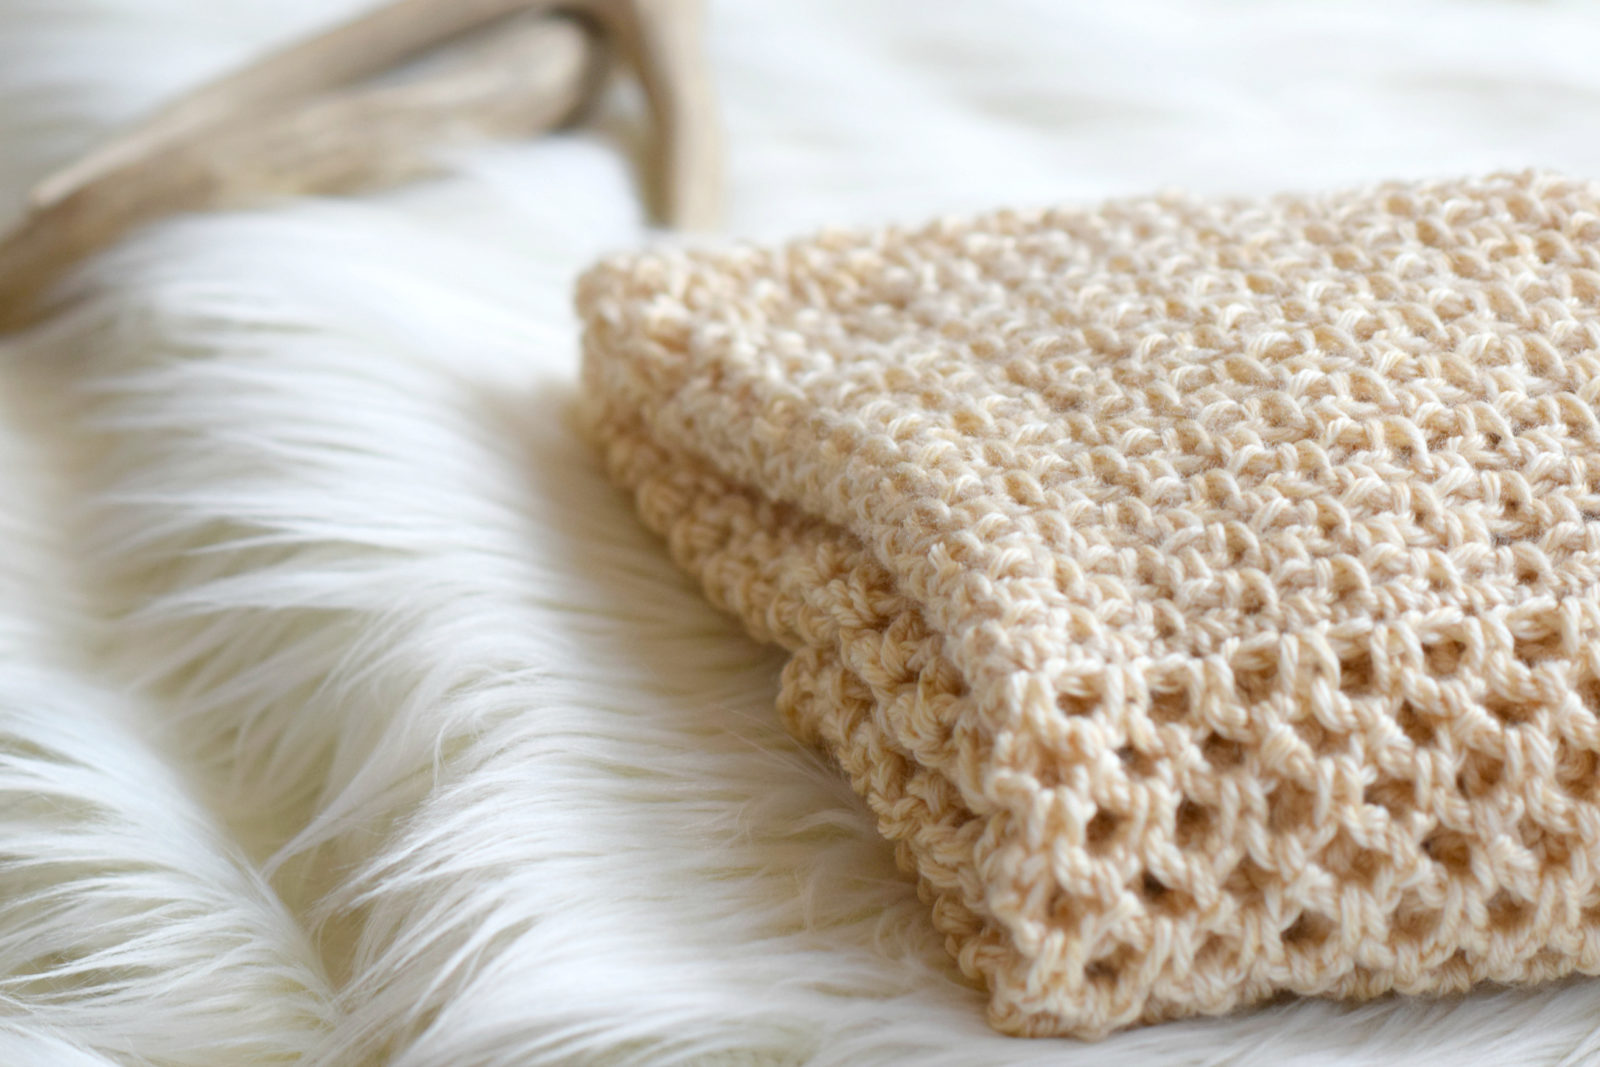
The diamond mesh stitch is a beautiful and versatile crochet stitch that creates a light, airy fabric with a delicate diamond pattern. It's a fantastic choice for summer garments like shawls, scarves, and tops, but can also be used for home decor items like table runners and doilies.
Basic Pattern
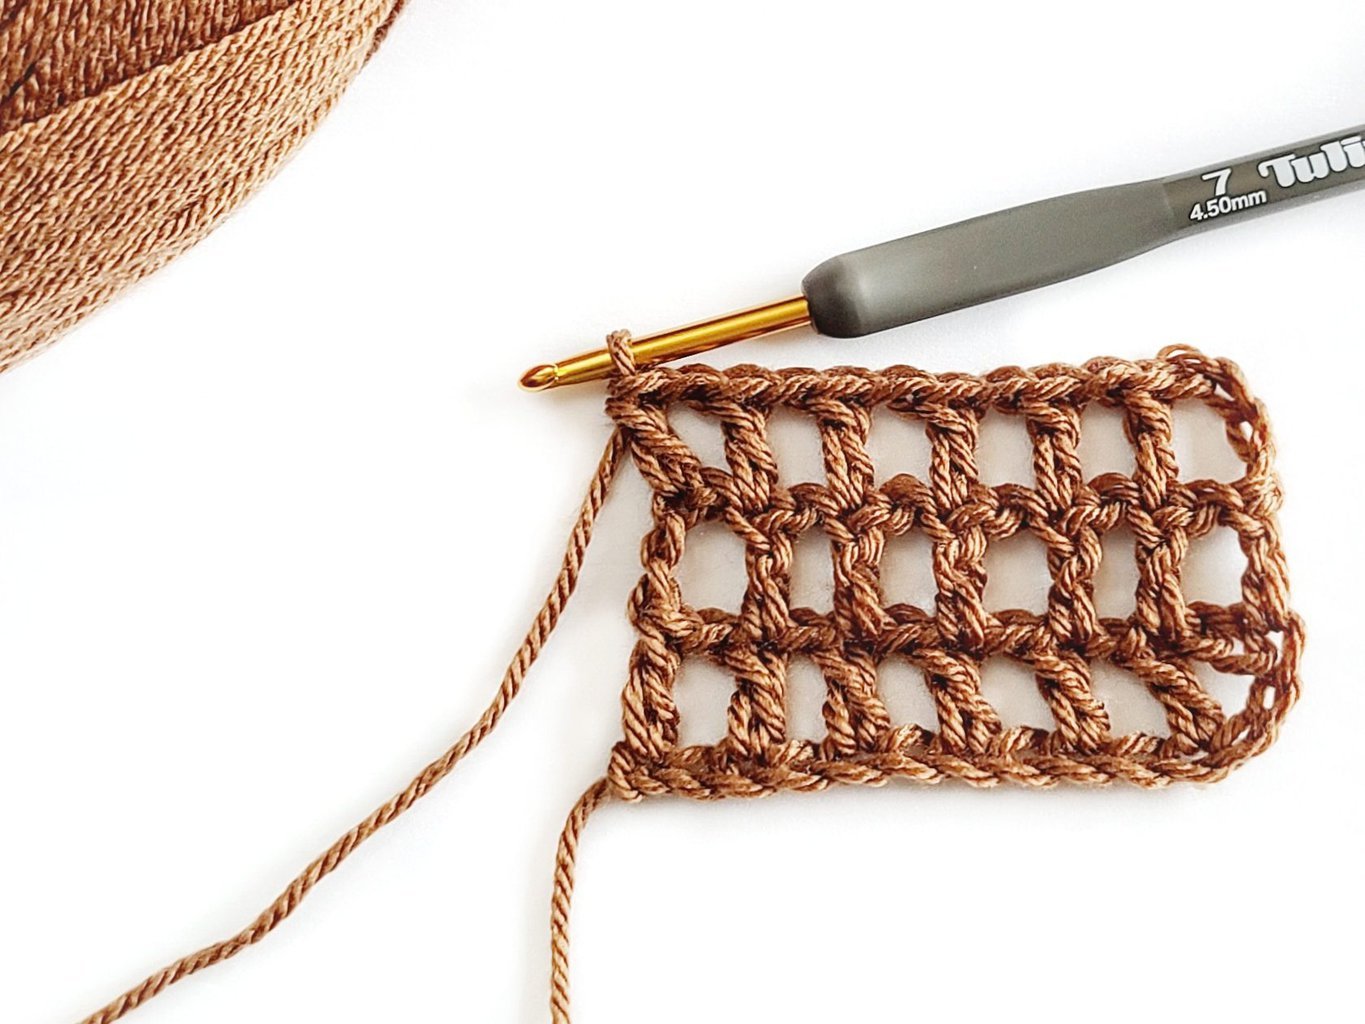
The diamond mesh stitch is a simple two-row repeat pattern that uses only chains, single crochets (sc), and double crochets (dc).
Row 1
- Chain 5 (ch 5).
- Skip 3 chains (ch 3).
- Single crochet (sc) in the next chain (ch).
- Repeat the sequence of ch 5, skip 3 ch, sc in next ch across the row.
Row 2
- Chain 3 (ch 3).
- Double crochet (dc) in the center chain space of the previous row's ch 5 space.
- Chain 2 (ch 2).
- Double crochet (dc) in the next chain space of the previous row's ch 5 space.
- Repeat the sequence of dc in center ch space, ch 2, dc in next ch space across the row.
Appearance
- The finished fabric has a distinctive diamond pattern formed by the gaps between the dc's and sc's.
- The chains create a light and airy texture, making the fabric perfect for warmer weather.
- The stitch is reversible, meaning it looks the same on both sides.
Tips For Crocheting The Diamond Mesh Stitch
- Use a larger crochet hook than you would normally use for the yarn weight to create a more open fabric.
- The foundation chain should be a multiple of 4 + 3.
- Be sure to work into the center chain space of the previous row's ch 5 space when making the dc's in row 2.
- This stitch can be easily modified to create different effects, such as adding beads or changing the size of the diamonds.
Tools And Materials Needed
Crocheting the beautiful diamond mesh stitch requires just a few basic tools and materials, with a few additions for venturing into increases and decreases. Here's a rundown of what you'll need:
Essentials
- Crochet hook -Choose a hook size appropriate for your yarn weight. For example, a size F (3.75mm) hook is ideal for worsted weight yarn.
- Yarn -Opt for a smooth, medium-twist yarn that will showcase the stitch definition well. Cotton, acrylic, or wool blends are all good choices.
- Yarn needle -This will be handy for weaving in ends and sewing up seams.
- Scissors -Snip away those yarn ends with precision!
For Increases And Decreases
- Stitch markers -These helpful little tools keep track of your pattern repeats and mark key points for increases and decreases.
- Tapestry needle (optional) -This can be helpful for working delicate yarn ends into tight spaces during decreases.
Additional Considerations
- Project bag (optional) -Keep your project organized and protected while you're on the go.
- Blocking board and pins (optional) -Blocking helps even out your stitches and achieve the desired shape for your finished project.
Here's A Closer Look At Some Of The Key Tools
- Crochet hook -The heart and soul of your crocheting endeavors! Choose a hook made from a smooth material like aluminum or bamboo for effortless gliding through your stitches. Consider ergonomic hooks if you tend to crochet for long periods to prevent hand fatigue.
- Yarn -Pick a yarn weight and color that suits your project. Remember, lighter weight yarns will create a more delicate fabric, while heavier yarns will result in a denser mesh.
- Stitch markers -These come in various shapes and sizes, so find ones that suit your crocheting style and project needs. They'll be your best friends when keeping track of intricate patterns and ensuring accurate increases and decreases.
With these tools and materials at your side, you're all set to conquer the diamond mesh stitch and its increase and decrease variations! Remember, practice makes perfect, so grab your hook and yarn, and get stitching!
Preparing To Increase And Decrease
Conquering the diamond mesh stitch's increases and decreases is a rewarding feat, but before you dive in, mastering the basic stitch itself is crucial. Here's what you need to have under your belt before venturing into modifications:
1. Solid Grasp Of The Basic Pattern
- Chain and single crochet (sc) -Be confident in making chains of various lengths and sc into different spaces (ch spaces, top of sc, etc.).
- Double crochet (dc) -Familiarity with working into ch spaces and understanding the two-loop nature of dc is essential.
- Row progression -Master working both rows of the repeat pattern flawlessly, focusing on consistent chain lengths and stitch placement.
2. Counting Stitches And Tracking Repeats
- Accurate stitch counting -Develop your stitch counting skills to ensure you work into the correct spaces for increases and decreases.
- Pattern reading -Being able to identify key points in the pattern for modifications is crucial.
- Marking stitch placements -Consider using stitch markers to track repeats and mark points for increases and decreases, especially if the pattern gets intricate.
3. Tension Control And Consistency
- Consistent stitch tension -Aim for even stitches throughout your work as it impacts how increases and decreases integrate seamlessly.
- Understanding gauge -Knowing your gauge and how it compares to the pattern's gauge is important for adjusting increases and decreases if needed.
4. Comfort With Basic Crochet Techniques
- Turning your work - Smooth turning avoids awkward gaps or bumps in your project, especially important when working increases and decreases.
- Working into tight spaces -Familiarity with maneuvering your hook in small spaces will prove useful for decreases.
- Reading stitch symbols -Being comfortable with crochet symbols will make following patterns with increase and decrease notations easier.
5. Practice Makes Perfect
- Experiment on a swatch -Before tackling your actual project, practice the basic stitch and modifications on a swatch to get comfortable with the techniques.
- Don't be afraid to unravel -Mistakes happen, and unraveling is part of the learning process. Embrace it as an opportunity to refine your skills.
Step-by-Step Guide To Increasing The Diamond Mesh Stitch
Mastering the diamond mesh stitch is fantastic, but adding increases opens up a whole new dimension for your crochet creations! This guide walks you through the process of increasing the stitch, step-by-step, with helpful images to aid your understanding.
Before You Begin
- Ensure you're comfortable with the basic diamond mesh stitch pattern (chain 5, skip 3, sc, repeat across).
- Choose where you want to increase within the row. Remember, increases should align with existing gaps between diamonds to maintain the pattern.
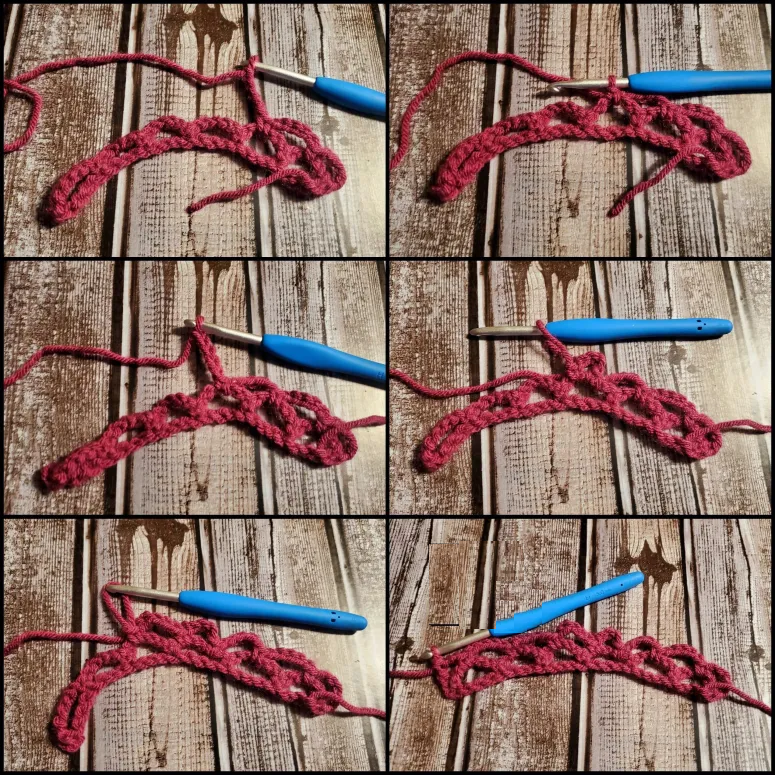
Let's Increase
1. Chain and skip as usual
Start by working the regular chain 5 and skip 3 chains of the base stitch pattern.
2. Work the first single crochet
Instead of working a single crochet into the next chain space as usual, make a single crochet into the same chain space you just skipped over.
3. Chain 5 again
Chain 5 as you would normally do for the stitch pattern.
4. Work the second single crochet
Make another single crochet into the same chain space you just created with the Chain 5.
5. Repeat for remaining increases
Continue working the increase by repeating steps 2-4 (single crochet in skipped space, chain 5, single crochet in same chain space) as many times as you need increases in that row.
6. Complete the row
Finish the row as usual with the remaining chain 5, skip 3, single crochet pattern until the end.
Here Are Some Additional Tips For Increasing
- Make sure your tension is consistent throughout the increases to avoid noticeable bumps.
- Use stitch markers to mark the points where you want to increase for easier reference.
- If you're working a pattern with specific increase instructions, follow them closely for optimal results.
Step-by-Step Guide To Decreasing The Diamond Mesh Stitch
The diamond mesh stitch's airy charm is undeniable, but sometimes you need to tighten things up! This guide delves into the art of decreasing the stitch, offering clear instructions and distinctions from the increase technique. So, grab your hook and yarn, and let's get started!
Before you begin
- Ensure you're comfortable with the basic diamond mesh stitch pattern.
- Choose where you want to decrease within the row. Remember, decreases should occur between diamonds, not within them.
Let's Decrease
1. Work regular chains and skip
Start by working the usual chain 5 and skip 3 chains of the base stitch pattern.
2. Double crochet, but with a twist
Instead of working a dc into the center chain space of the previous row's chain 5 space, you'll be working a decrease double crochet (dc2tog). To do this, insert your hook under both loops of the chain 3 space you just skipped, yarn over, pull up a loop, yarn over again, and pull through both loops on your hook.
3. Chain 2 as usual
Chain 2 as you would normally do for the stitch pattern.
4. Skip the next chain 5 space
Instead of working into the center chain space of the next chain 5 space, simply skip over the entire chain 5 space.
5. Repeat for remaining decreases
Continue working the decrease by repeating steps 2-4 (dc2tog into skipped chain 3 space, chain 2, skip next chain 5 space) as many times as you need decreases in that row.
6. Complete the row
Finish the row as usual with the remaining chain 5, skip 3, single crochet pattern until the end.
Here are some additional tips for decreasing
- Remember, you're skipping chain 5 spaces entirely during decreases, not just the center chain space.
- Use stitch markers to mark the points where you want to decrease for easier reference.
- Maintain consistent tension throughout decreases to avoid unwanted gaps or bumps.
Troubleshooting Common Issues
Adding increases and decreases to the stunning diamond mesh stitch opens up a world of creative possibilities, but it's not always smooth sailing. Let's explore some common challenges and how to navigate them like a crochet pro!
Increasing woes
1. Uneven Stitch Count
- Issue -You end up with more or fewer stitches than intended after increasing.
- Possible cause -Inconsistent chain lengths or missing a single crochet in the increase sequence.
- Solution -Double-check your stitch count frequently. Count chains carefully and ensure you work both single crochets in the same chain space during the increase.
2. Visible Bumps
- Issue -Noticeable bumps appear around the increase points.
- Possible cause -Inconsistent tension or working into the wrong spaces.
- Solution -Maintain consistent tension throughout the increase sequence. Ensure you work the single crochets into the skipped chain space, not the neighboring chain spaces.
3. Pattern Distortion
- Issue -The diamond pattern appears distorted or misaligned after increasing.
- Possible cause -Placing increases incorrectly or not following the increase instructions in the specific pattern.
- Solution -Pay close attention to where the pattern indicates increases should occur. Use stitch markers to track your placement. If using a specific pattern, follow its increase instructions precisely.
Decreasing dilemmas
1. Gaping Holes
- Issue -Noticeable gaps appear around the decrease points.
- Possible cause -Working the dc2tog too loosely or skipping chain spaces unintentionally.
- Solution -Ensure you work the dc2tog tightly under both loops of the chain 3 space. Double-check that you're skipping the entire chain 5 space between decreases, not just the center chain space.
2. Uneven Tension
- Issue -The fabric around the decrease points appears tighter or looser than the rest.
- Possible cause -Inconsistent tension during the decrease sequence.
- Solution -Maintain consistent tension throughout the dc2tog and chain 2 sequence. Focus on smooth yarn over and pull through motions.
3. Difficulty Working In Tight Spaces
- Issue - Struggling to maneuver your hook and yarn during the decrease sequences.
- Possible cause -Using a bulky yarn or hook for the small spaces created by the decreases.
- Solution -Consider using a smaller hook size for decreases, especially with thicker yarn. Alternatively, use a tapestry needle to manipulate yarn ends for easier stitching.
General Tips For Avoiding Issues
- Practice the basic diamond mesh stitch before attempting increases and decreases.
- Use stitch markers to track your pattern and mark increase/decrease points.
- Work with good lighting and magnification if needed to see stitches clearly.
- Don't be afraid to unravel and retry if you encounter mistakes.
- Most importantly, have fun and enjoy the creative possibilities that increases and decreases unlock in your diamond mesh projects!
Advanced Tips And Tricks
Once you've conquered the basics of increasing and decreasing the diamond mesh stitch, it's time to elevate your skills with some advanced tips and tricks! Get ready to take your creations to the next level:
Tension Is Key
- Maintain consistent tension -This is crucial for both increases and decreases. Uneven tension creates visible bumps and distorts the pattern. Practice mindful yarn overs and smooth pulls to achieve consistent stitches.
- Tension adjustments for increases -Consider using a slightly smaller hook size for increases to compensate for the added stitches and maintain overall fabric drape.
- Tension adjustments for decreases -Working decreases might feel tighter, so try a slightly larger hook size to keep the fabric balanced.
Beyond The Basics
- Invisible increases -Want seamless increases? Work the single crochets in the increase sequence into the back loops of the skipped chain spaces for a smoother transition.
- Creative decreases -Explore different dc2tog variations like working into the third loops of the chain spaces for a textured effect or using slip stitches to close the gaps for a neater finish.
- Shaping with increases and decreases -Combine increases and decreases strategically to create unique shapes in your projects. Think triangles, waves, or even circular motifs!
Adapting To Design
- Gauge matters -Adjust your increase and decrease placements based on your gauge to ensure the pattern proportions remain balanced.
- Color play -Introduce contrasting or complementary colors around increase and decrease points to highlight the shaping or create interesting visual effects.
- Texture combinations -Experiment with textured yarns or alternating stitch heights around increases and decreases to add dimensionality.
Remember
- Practice makes perfect -Don't be afraid to experiment and try out different techniques to find what works best for you.
- Embrace imperfection -Slight variations in tension or stitch size can add character and charm to your work.
- Most importantly, have fun -Enjoy the creative process and explore the endless possibilities the diamond mesh stitch offers.
With these advanced tips and tricks, you'll be able to confidently tackle intricate increases and decreases, shaping your diamond mesh projects into stunning and unique creations. Happy crocheting!
See Also: How To Crochet The Granny Hexagon